For my birthday this year, I bought myself a present: The 3D Point of Interest (POI) mapping ability in DJI GS Pro. A small splurge to be sure ($10), but oh, the great joy it brought me! As soon as it was loaded on my mobile device, I immediately started my flight plan with a specific 3D POI in mind – a handful of large boulders that jut out on the tundra further out the road, very much out of place in a world of thick duff and understory. These boulders are in fact glacial erratics, remnants left behind as the glaciers receded. You can read about glaciers and the geology of the area at the Denali National Park and Preserve website.
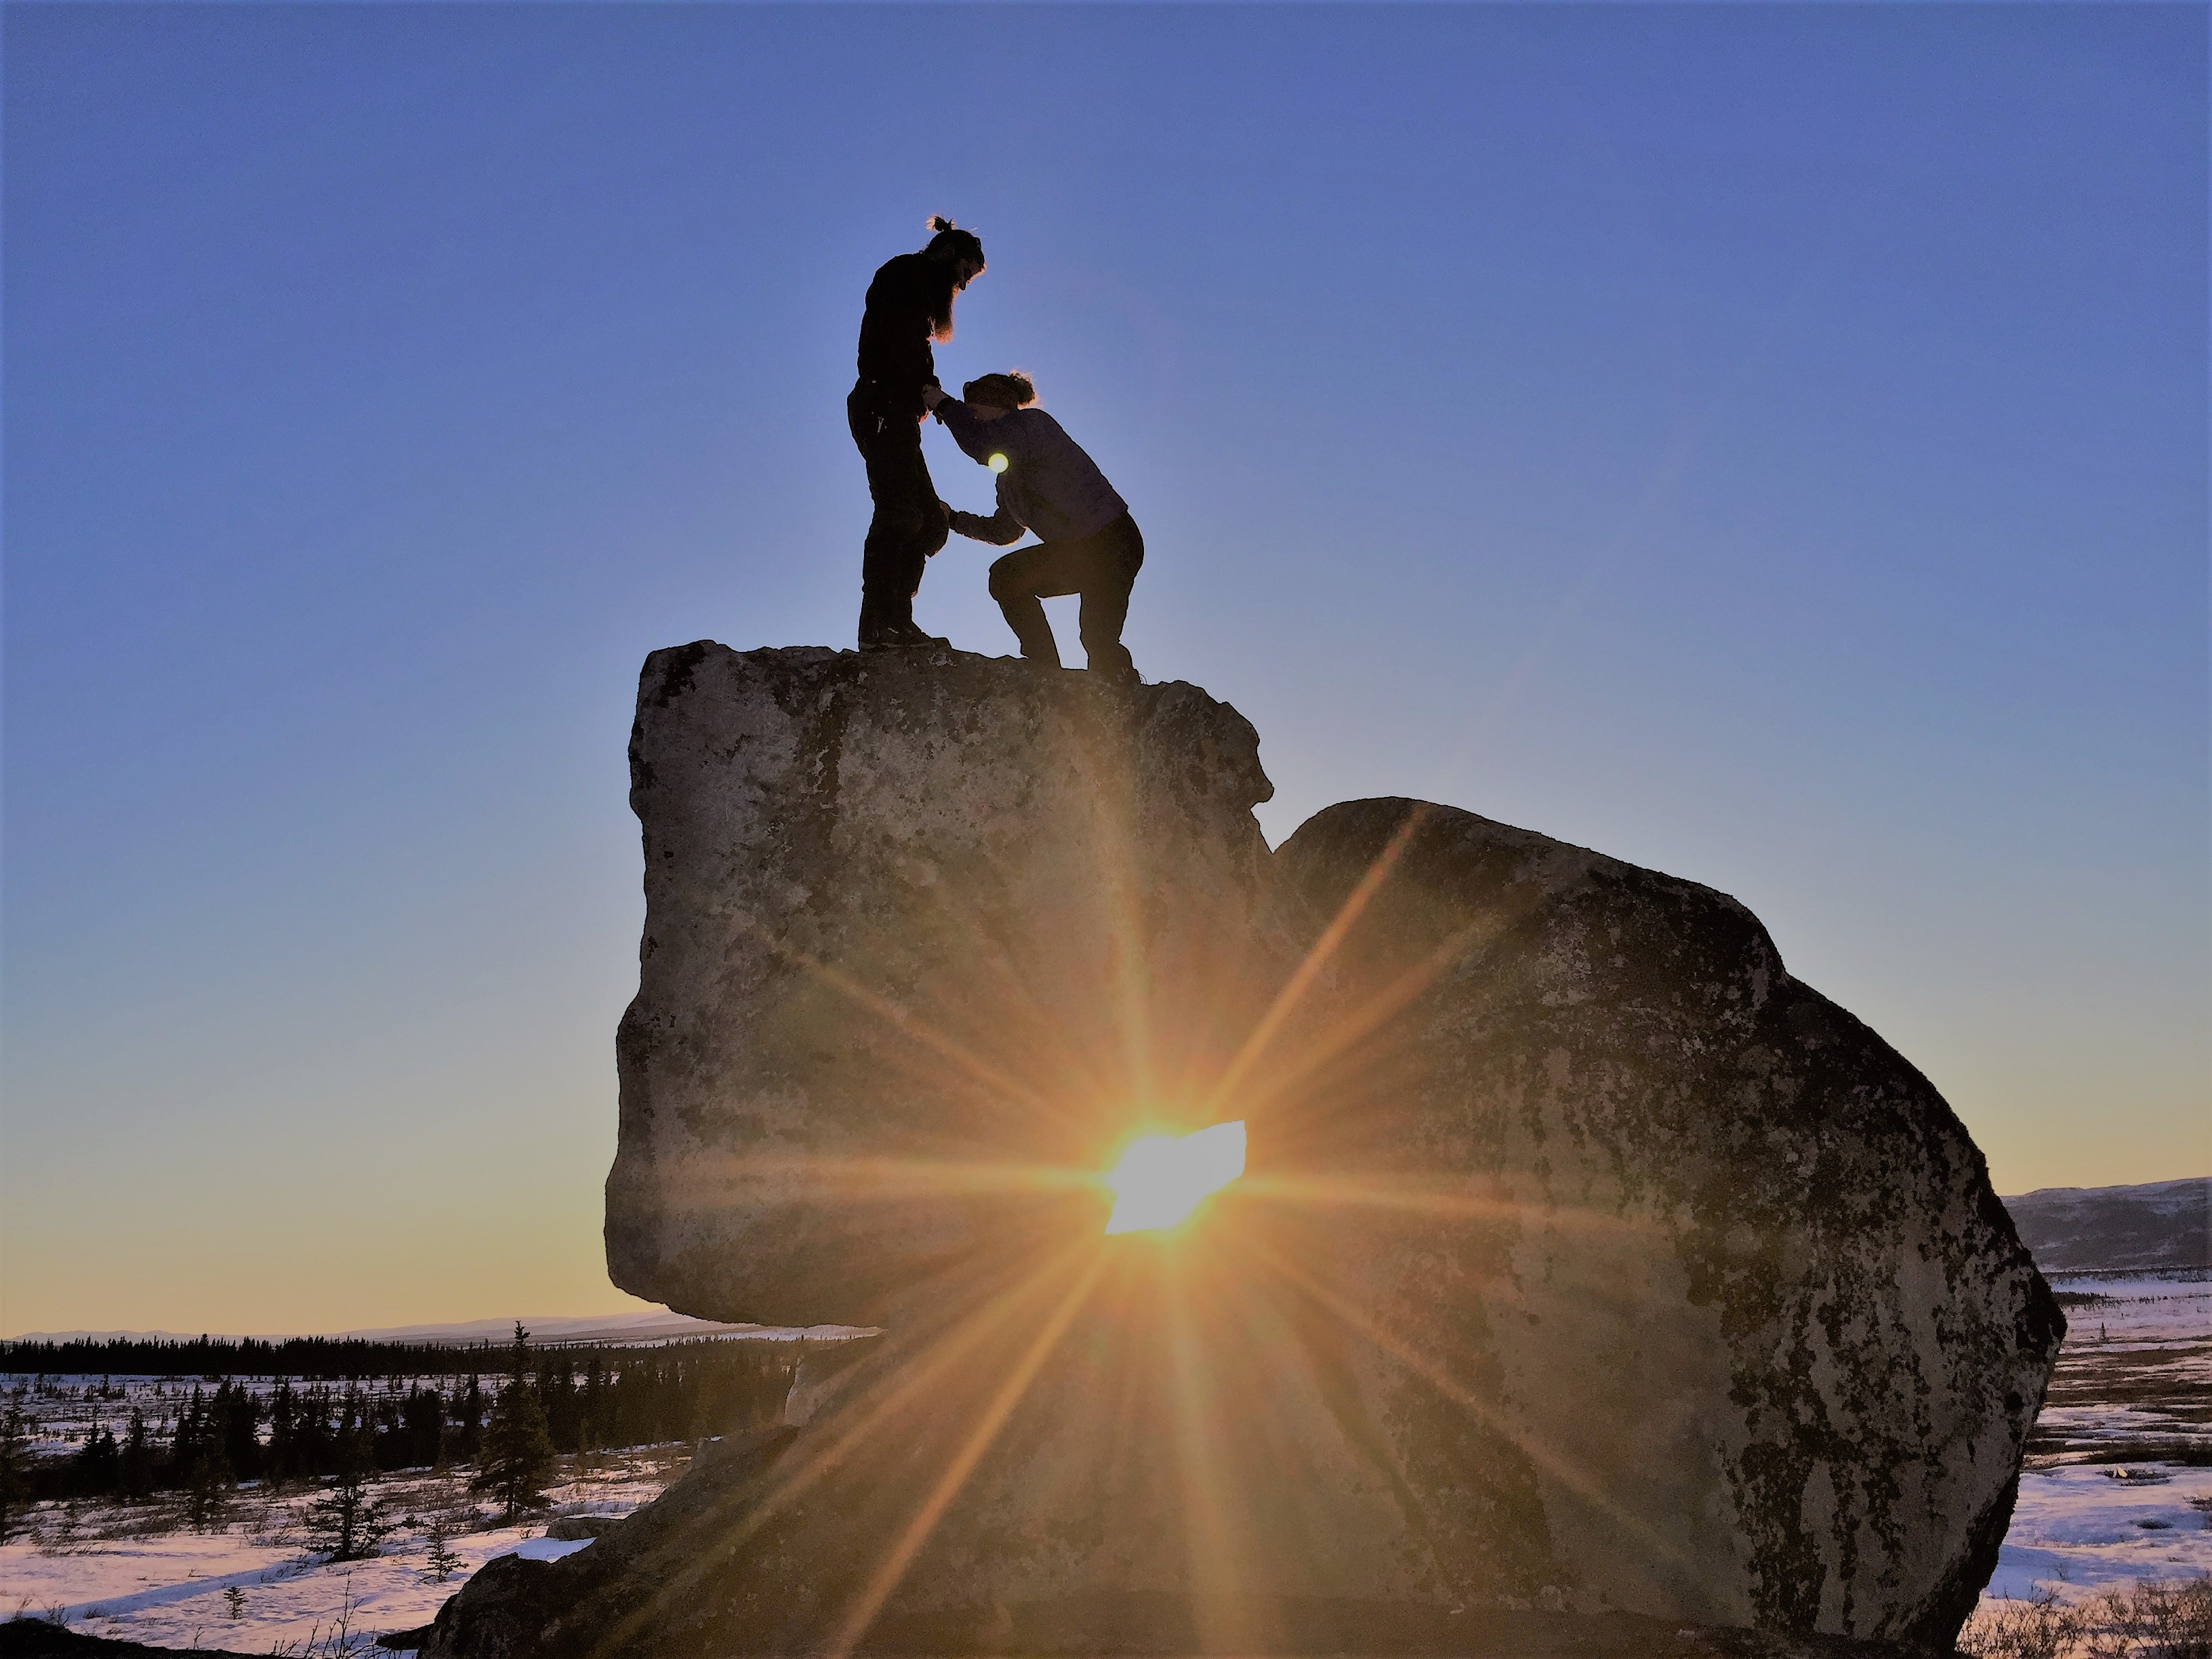
I’ve visited these erratics either by foot or ski over the years, and while there isn’t anything spectacular about these particular rocks, I find myself drawn to them. Besides, it was the only thing that met all the objects for a safe test flight: tall object, no trees, no people or infrastructure, uncontrolled airspace and approved land ownership.
It’s my birthday and I’ll map what I want to.
My goals for the day were to:
- Map the erratics as a 3D POI
- Capture video through and around erratics
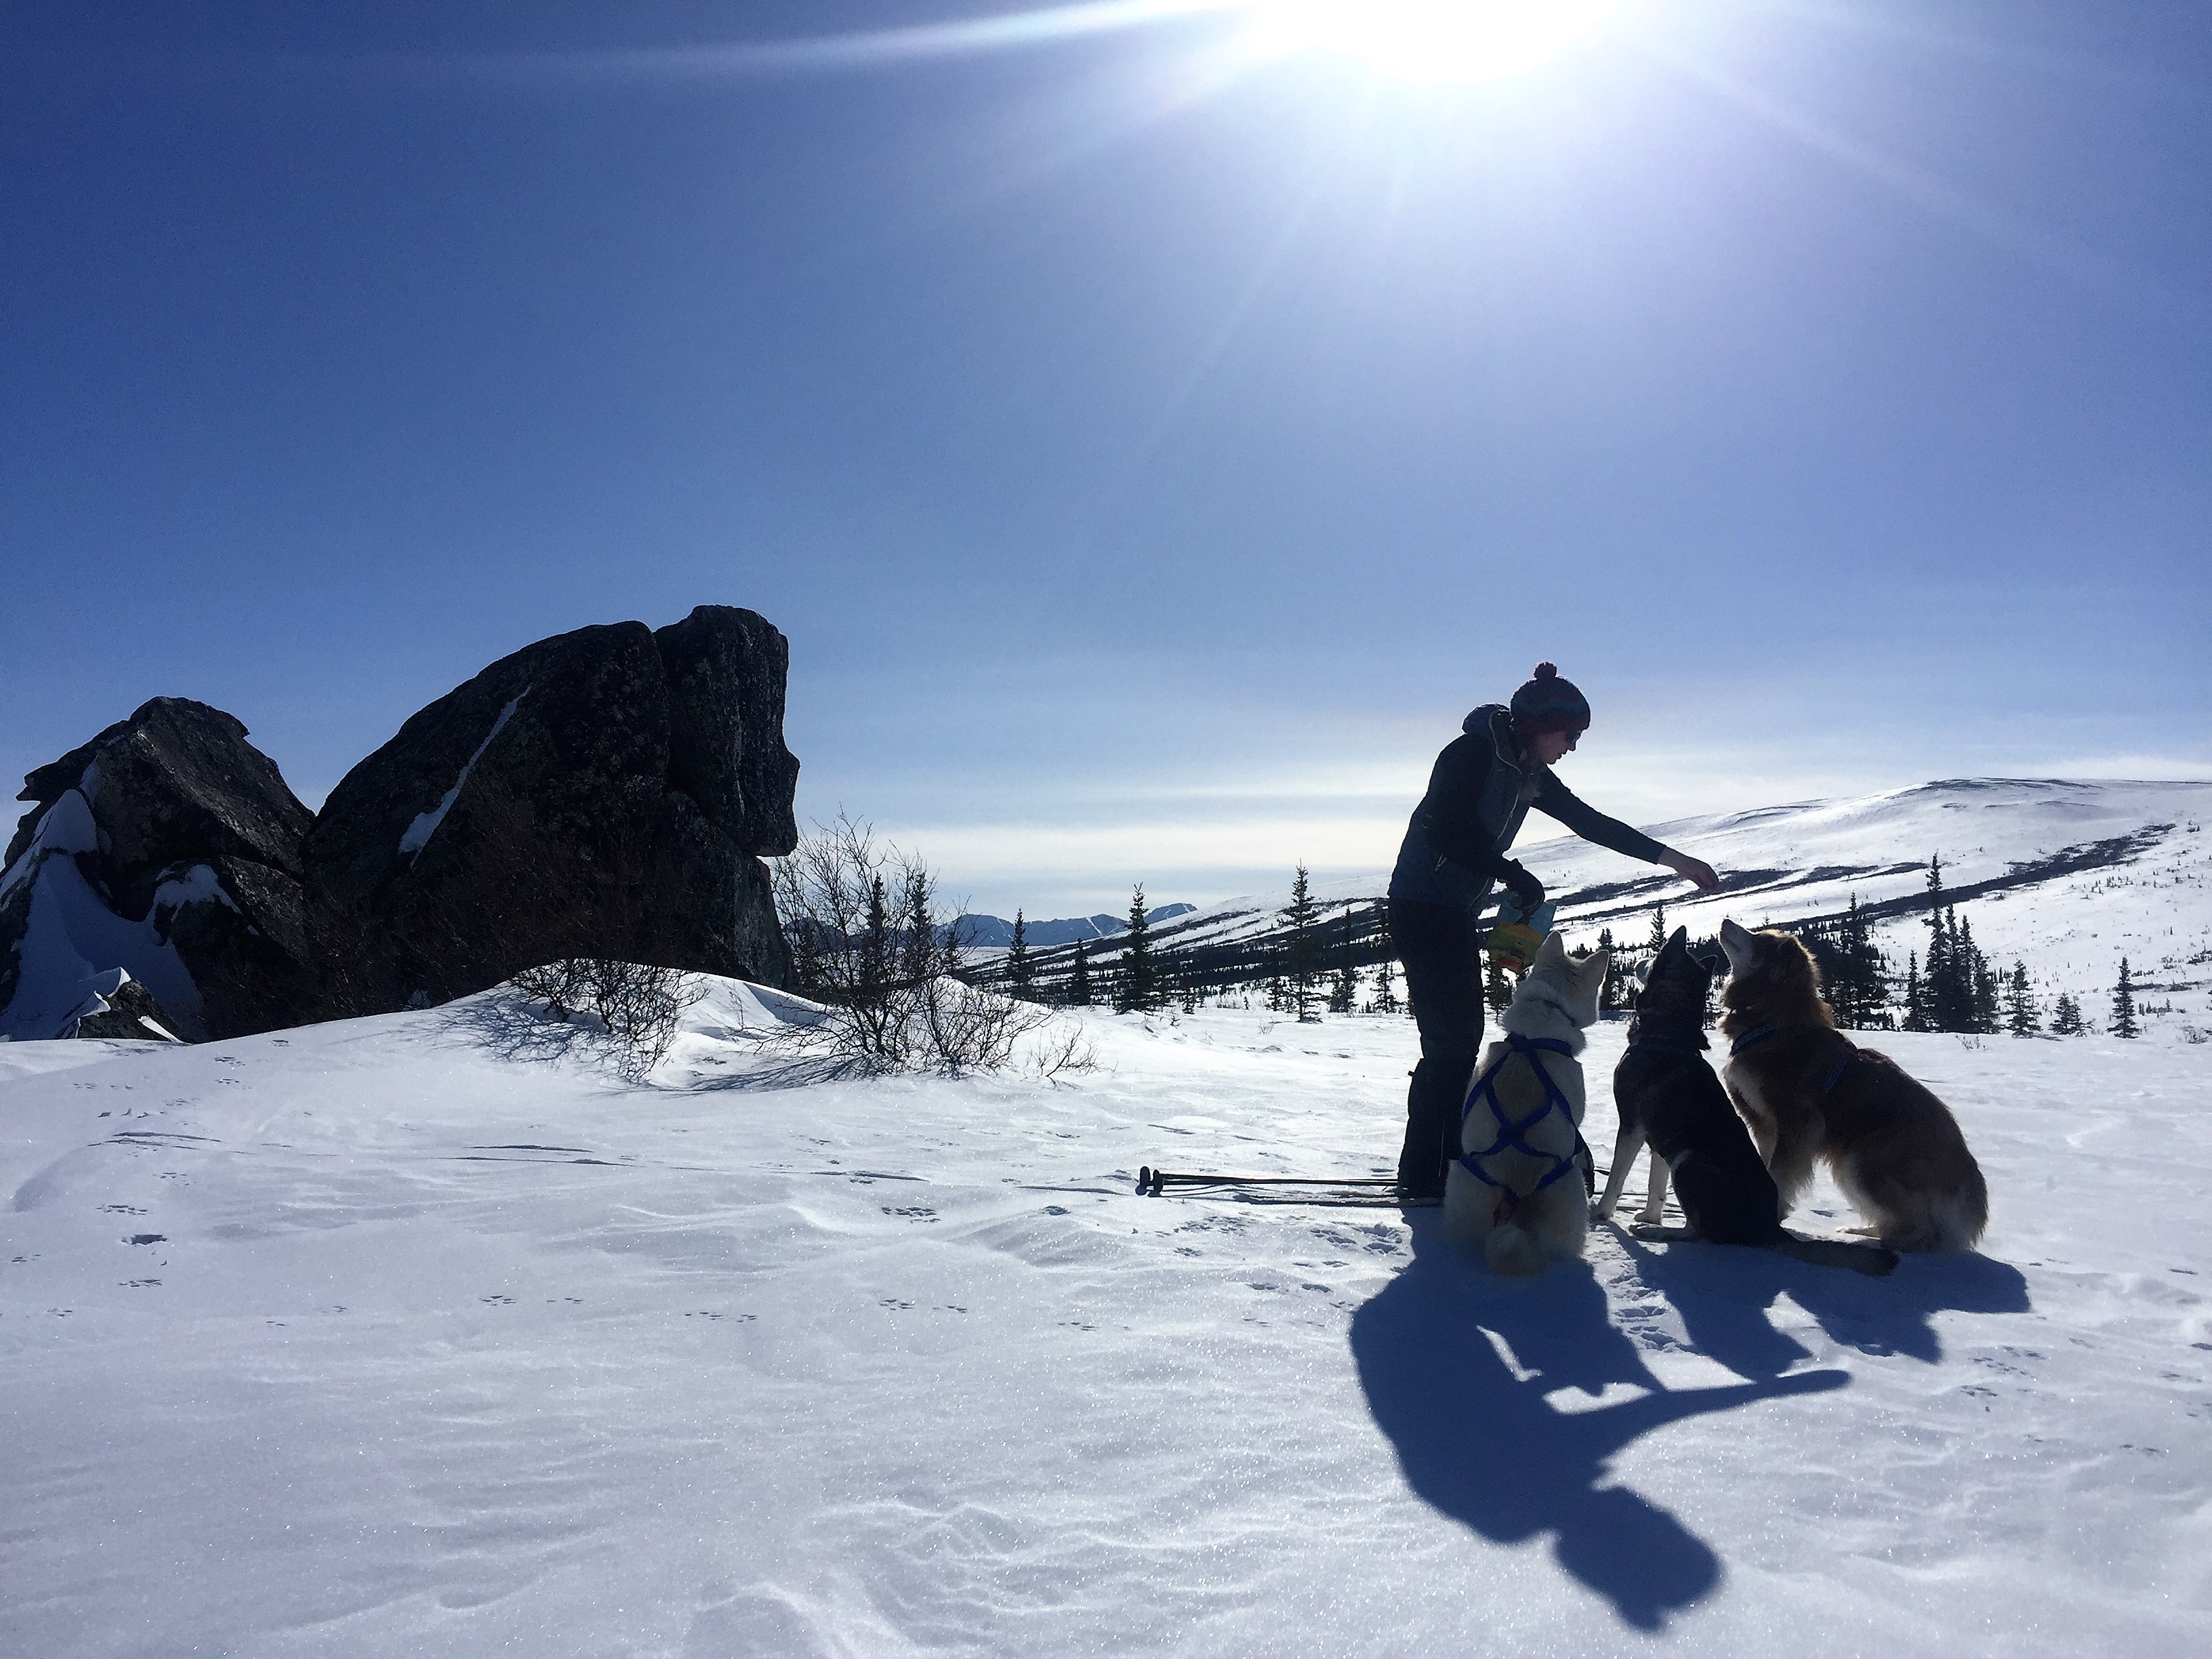
- Pick a gallon of cloudberries and give the dog (and myself) some exercise
- Process a 3D model for GIS, extract video tracks in FMV, and generate animation with 3D model to match video
Goal #1 – Map Erratics in 3D POI
For those not familiar with the nuances of mapping, most of the photogrammetric products we are familiar with are satellite or aerial photos, usually taken with a sensor nadir to the ground with flight transects on a parallel plane to the area of interest – usually at a set altitude, producing planar projections. But in the case of mapping a 3D object, like a building or a statute or a tall rock, the transects orbit the point of interest at varying altitudes, and the angle of the sensor changes with each vertical orbit to retain the POI in the center of the image. Manually creating these transects can be tiresome, or liberating, depending on your mood and the autopilot program you use (!@%^##&*^ Mission Planner). Thus, my splurge on the extension in the DJI GS Pro app, which does the math for me. Entering the size of the POI and the radius of the desired orbit sets the heading of the UAS and the relative yaw of the gimbal. So easy, I can pick berries and map at the same time…
Goal #2 – Capture Video
Videography is my weak suite compared to photogrammetry, and every flight is a learning moment in maximizing battery life for share-worthy shots. This is easier in the summer here in Alaska, when the air is warm enough to operate the controls with bare fingers but given the short season, I only have about 4 gloveless months.
This goal was actually a two parter: 1) Establish a waypoint mission that I can then save and upload each time I visit (making those gloved month operations a lot easier!) and 2) Collect video in MISB compliant fashion for pulling out GPS tracks in ArcGIS. From the tracks, after processing the 3D model, I could recreate the same flights in ArcGIS Pro using animation. Below is my best attempt (I’m obviously not a FPV racer).
Goal #3 – Dog walking and berry picking
Check and check.


Goal #4 – Post-process
The 3D model of the erratics turned out well in terms of resolution – 1 cm GSD for the orthos and 2 cm GSD for the DEM. I did not put in any ground control because all I wanted was a nice photo draped over a surface. Unfortunately, I did not export the telemetry CSV data from the flight or sync my flights to the cloud before losing my phone to saltwater a few days later, dipnetting on the Kasilof River on the Kenai. While I couldn’t create animation from the FMV track, I could still do a fly through in Arc Pro, just based on my best guess. Below is a video of the 3D animation (make sure you watch it in 1080 HD).
For the most part, all four goals were met, making it a successful flight and birthday. 👩🏼✈️👩🏼💻🎉🎁
Now what to do with all those berries?

You must be logged in to post a comment.